Image generation
AI Product Photography Workflow From Reference Image to Store-Ready Assets
TL;DR
A practical AI product photography workflow for turning one product reference into main, lifestyle, detail, and edited store-ready assets.
An AI product photography workflow should start with product facts, not with a dramatic prompt. The reliable sequence is: choose the clearest reference image, define the image role, generate one product-led asset, compare it against the real SKU, clean only the parts that need work, then export the image into the right listing or campaign set.
In KrafLayer, this workflow usually starts on the [AI product photography](/ai-product-photography) side, moves through the [AI product image generator](/ai-product-image-generator), and finishes with review or cleanup in the [product photo editor](/product-photo-editor). The point is not to make a random studio scene. The point is to create store-ready product photos that still match what the buyer will receive and fit the rest of your [ecommerce product photography](/ecommerce-product-photography) set.
The Workflow Rule
The practical rule is simple: every step should either protect product truth or make one selling role clearer. If a step makes the image prettier but changes the product, skip it.
Use this AI product photography workflow from reference image to final export:
- Pick one accurate product reference.
- Write a product-truth list before prompting.
- Choose the image role: main, lifestyle, detail, comparison, ad crop, or marketplace cleanup.
- Generate one asset at a time.
- Review the output against the product-truth list.
- Edit only the weak area instead of regenerating the whole product.
- Export the final image into a consistent ecommerce product photography set.
That sequence keeps the workflow concrete. It also avoids the common mistake of treating AI product photography as a style generator instead of a controlled product-image process.
Step 1: Start With The Clearest Reference Image
Your reference image does not need perfect lighting. It needs enough product information for the model and the reviewer to understand the SKU.
Before using an AI product image generator workflow, inspect the reference for:
- full product silhouette
- true color and finish
- material texture
- labels, logos, tags, or package panels
- hardware, seams, ports, handles, hinges, dials, clasps, or closures
- scale cues such as cup size, hand size, room size, or product thickness
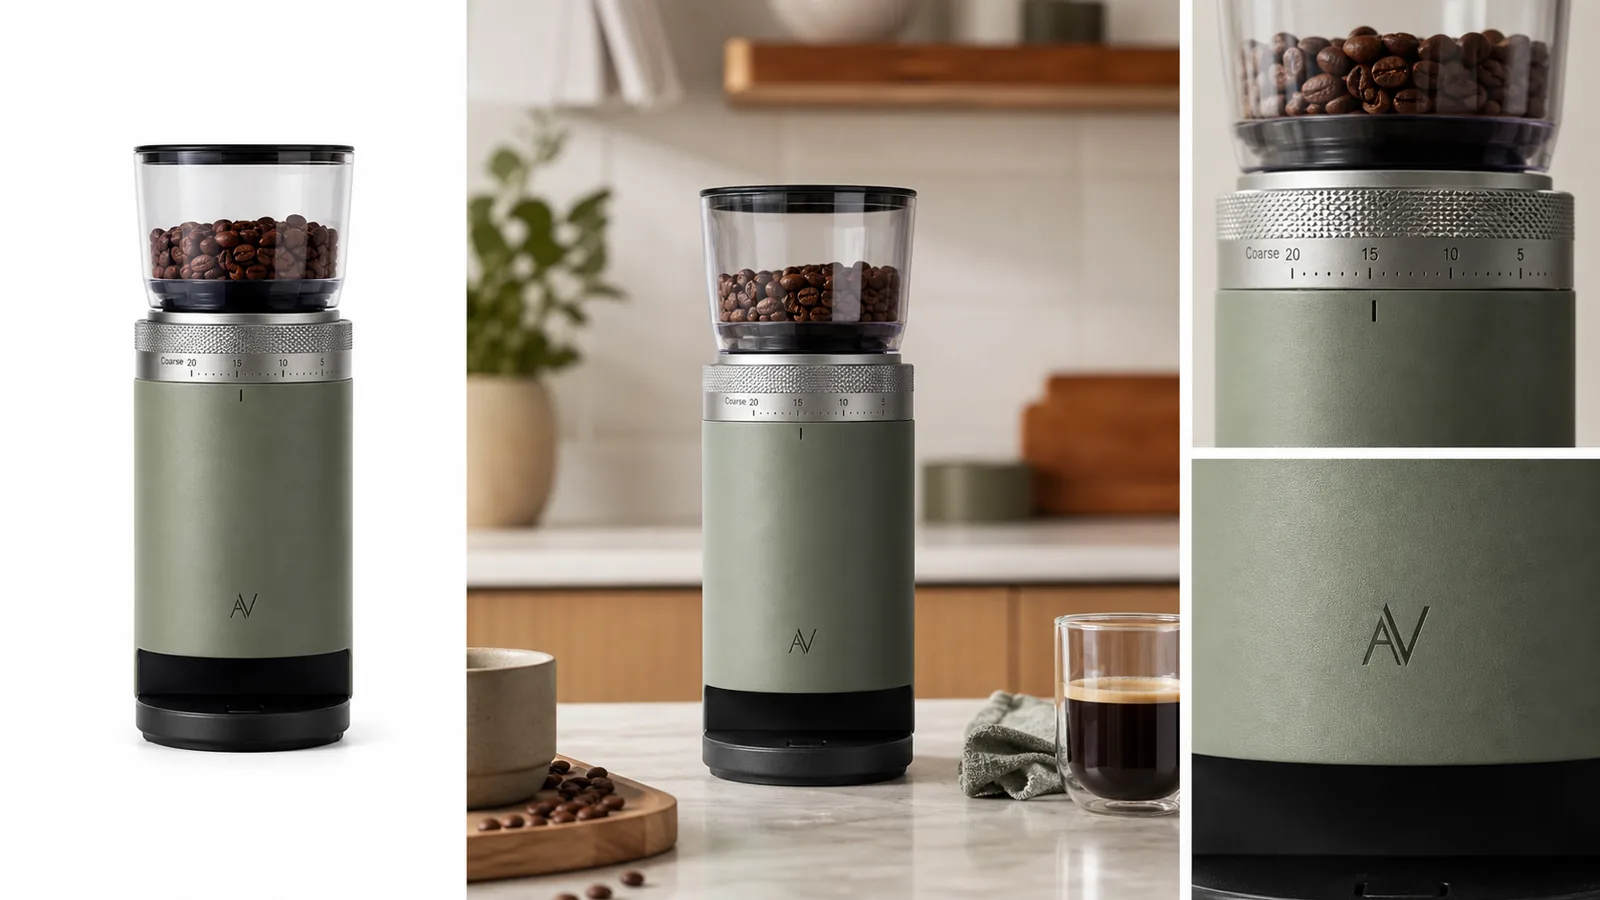
For the Aven espresso grinder example above, the protected facts are the matte sage cylinder, clear bean hopper, black base, silver burr dial, compact scale, and small invented monogram. The lifestyle and detail views can change the setting, but they should not redesign the grinder.
Step 2: Define The Store-Ready Image Role
Store-ready product photos are not all trying to do the same job. A good workflow names the role before writing the prompt.
Use these roles:
- Main image: clean product recognition, centered shape, no clutter.
- Lifestyle image: believable use context, scale, surface, and light.
- Detail image: one close product fact such as texture, stitching, dial, label, lid, port, or material.
- Feature image: one practical benefit, not a fake badge or unsupported claim.
- Ad crop: stronger composition while keeping the product readable.
- Cleanup image: background, shadow, crop, or small defect repair.
This is where AI product photography workflow becomes different from generic prompt writing. The prompt should serve the product page, not the other way around.
Step 3: Generate One Product-Led Asset
Start with one role and one product. Avoid asking for a full catalog set in a single prompt if product accuracy matters.
A reusable prompt structure:
Create a realistic ecommerce product photo from this reference. Keep the same product shape, color, material, scale, logo area, hardware, and camera-angle family. Create a [main image / lifestyle scene / detail image] for [store page / marketplace listing / campaign]. Use natural commercial lighting and a clean selling context. Do not add platform UI, badges, claims, barcodes, QR codes, extra accessories, or new product features.
For a store-ready product photos workflow, the strongest first output is often a main image or lifestyle image. Detail views can follow once the product identity is stable.
Step 4: Review Product Truth Before Editing
Review is the part many AI workflows skip. It is also where ecommerce risk usually appears.
Check the generated image for:
- shape drift: the product is taller, wider, smoother, or redesigned
- color drift: sage becomes gray, black becomes navy, gold becomes yellow
- material drift: ceramic looks plastic, leather looks vinyl, glass loses thickness
- feature drift: ports, dials, seams, closures, stones, laces, buttons, or labels move
- scale drift: the product becomes too large or too small for the scene
- claim drift: the image adds fake badges, ratings, awards, certifications, discounts, or platform marks
The best AI product photography workflow treats review as a required production step. If the generated output changes what the buyer receives, it is not store-ready.
Step 5: Clean The Image Without Regenerating The SKU
If the image is mostly right, use editing rather than full regeneration. A full regeneration can fix one shadow while silently changing the product.
Use KrafLayer editing tools based on the problem:
- Use background cleanup when the product is accurate but the setting is distracting.
- Use local product photo editing when one area needs glare, dust, crease, crop, or shadow cleanup.
- Use upscaling when the composition is correct but the file is too soft.
- Use background replacement when the product is accurate but the selling context needs to change.
For the grinder example, the right cleanup might be: keep the same grinder, preserve the dial markings and hopper shape, soften a harsh shadow, and remove stray beans that distract from the product. That is a product photo editor workflow, not a new generation request.
Step 6: Build A Consistent Ecommerce Product Photography Set
One good image is useful. A consistent set is what makes a product page feel trustworthy.
For most ecommerce product photography workflows, build this small set:
- One clean main image for immediate product recognition.
- One lifestyle image showing scale and use context.
- One detail image proving material, mechanism, closure, texture, or finish.
- One alternate angle if shape, depth, or feature placement matters.
- One ad or social crop only after the product facts are stable.
The images should feel related. They do not need identical backgrounds, but product color, scale, lighting logic, and material should stay believable across the set.
What To Avoid
Avoid these workflow shortcuts:
- generating a whole campaign from a weak reference
- changing the product to fit a trendy scene
- using fake marketplace UI or platform badges
- adding claims the product label or seller cannot support
- making detail images from invented parts
- upscaling unreadable labels into invented text
- publishing without comparing against the real SKU
AI can create polished product images quickly, but ecommerce publishing still needs judgment. The buyer should not learn new product facts from an AI mistake.
FAQ
What is an AI product photography workflow?
An AI product photography workflow is a repeatable process for turning a product reference into ecommerce images. A practical workflow includes reference selection, product-truth notes, image-role planning, generation, review, cleanup, and export into a store-ready image set.
What should I do before generating AI product photos?
Before generating, write down the product facts that cannot change: shape, color, material, scale, label placement, hardware, seams, ports, buttons, dials, closures, and any included accessories. This gives you a checklist for reviewing the output.
How many AI product images should I generate at once?
Generate one image role at a time when product accuracy matters. Start with a main image or lifestyle image, review product truth, then generate detail or ad crops after the product identity is stable. This reduces hidden SKU drift.
When should I use a product photo editor instead of regenerating?
Use a product photo editor when the image is mostly correct but one area needs cleanup, such as glare, dust, shadow, background clutter, crop, or a small local defect. Regenerate only when the entire concept or image role is wrong.
Can KrafLayer create a full ecommerce product photography set?
KrafLayer can support the workflow from product reference to generated image to final cleanup. Use the AI product image generator for new image roles, then review and edit outputs before placing them into a consistent ecommerce product photography set.
Conclusion
An AI product photography workflow works when it is disciplined: start from a real reference, define the image role, protect product truth, generate one asset, review it, then clean only what needs work. KrafLayer fits this process because it connects generation and editing, helping sellers move from reference image to store-ready product photos without turning the SKU into a generic AI scene.
Related articles
Image generation · 6 min read
AI Product Photography for Fashion Products: Flats, Models, and Detail Shots
Use AI product photography for fashion to create flat lays, model images, detail crops, and lifestyle shots while checking fit, fabric, color, and garment truth.
Image generation · 6 min read
AI Product Photography Examples: What to Inspect Before You Use Them
A practical way to inspect AI product photography examples before using them: main images, lifestyle scenes, detail crops, ad crops, and product-truth checks.
Image generation · 5 min read
AI Product Photography for Ecommerce: What It Can Replace and What Still Needs Review
A practical guide to what AI product photography can replace for ecommerce teams, what still needs review, and how to protect product truth.
Image generation · 6 min read
AI Product Photography Tools for Ecommerce Product Images
A practical guide to choosing AI product photography tools by ecommerce job: generation, background cleanup, editing, upscaling, and scene composition.
Image generation · 6 min read
Free AI Product Photography: What to Try and What to Check
A practical free-to-start AI product photography workflow with product-truth checks before any image goes live.
Image generation · 5 min read
How to Create Food Packaging Detail Images for Ecommerce Pages
A practical workflow for creating food packaging detail images that show package material, closure, product texture, and label areas without inventing claims.
Related KrafLayer tools
- AI product image tools — Browse the full tool list for ecommerce image editing and product visual workflows.
- Ecommerce product photography — Plan listing images, lifestyle scenes, detail shots, and store-ready ecommerce product photos.
- Listing main and detail images — Generate ecommerce listing main images and detail-page product visuals from product references.
- On-model product photos — Create product-on-model and lifestyle visuals when human context helps the product sell.
- Marketplace product images — Choose product image workflows for Shopify, Amazon, Etsy, Walmart, WooCommerce, and other selling channels.
- Product category image styles — Browse category-specific product image pages for beauty, jewelry, fashion, furniture, tech, food, and more.
- Product photo editor — Clean, retouch, upscale, restore, outpaint, and repair product photos before publishing.
- Reference-style product images — Generate ecommerce product images from competitor, brand, or campaign reference styles while preserving your own product identity.
- AI background remover — Create clean transparent product cutouts for listings, ads, and layout work.
- AI object eraser — Remove props, text, clutter, or distractions from product images.
- AI image upscaler — Increase product image resolution for listings, ads, and detail-page assets.
- AI image restoration — Refresh damaged, low-quality, or older product photos before reuse.
- AI background replacer — Move a product into a cleaner studio, lifestyle, or campaign background.
- AI mask edit — Edit selected regions while keeping the rest of the product image stable.
- AI reference image editor — Use extra references to guide product identity, material, style, or composition changes.
- AI scene compose — Place products into controlled commercial scenes without losing product clarity.