Platforms
Home / Blog / Poshmark Listing Photos: Cover Shot, Size, and How Many to Upload
Poshmark Listing Photos: Cover Shot, Size, and How Many to Upload
Poshmark's official photo guidance in one place: the Covershot, the portrait 3:4 format, the 16-photo limit, flaw photos and a clothing shot list.
Poshmark listing photos follow a short set of published rules: the first photo is the Covershot, a listing can hold up to 16 photos and 1 video, and photos now display in portrait format at a 3:4 ratio instead of square. Poshmark's own pages give no pixel dimensions, so the shape and the framing are what you can control. Below is what Poshmark says, where its older guide is out of date, and a shot list for a clothing listing.
Quick Summary
Poshmark says listing photos now appear in portrait format (3:4 ratio), and cover photos display in portrait instead of square (1:1). You can upload up to 16 photos, and Poshmark asks you to include photos of any rips, stains or signs of wear.
Key Takeaways
- The Covershot is the first photo in a listing; Poshmark recommends a white or simple background for it.
- Cover photos now display in portrait (3:4) instead of square (1:1), according to Poshmark's March 2026 post.
- The maximum number of photos you can upload to a listing is 16, and Poshmark's photography guide adds 1 video.
- Existing square photos are kept, and Poshmark says no action is needed for them.
- Poshmark's guide asks for photos of any rips, stains or signs of wear, plus the tag so the buyer can check sizing.
What does Poshmark say about listing photos right now?
Poshmark publishes its photo guidance in three places, and they do not fully agree with each other. The most recent is the blog post A New Look for Listing Photos, published on March 25, 2026, which covers the move to portrait format. The older Poshmark Listing Photography Guide covers the Covershot, detail photos, lighting and backgrounds. The help guide How Do I List an Item? gives the photo limit.
The photography guide still tells sellers to shoot in square (1:1) mode and to crop photos to square when uploading. That advice conflicts with the 2026 post. Where the two differ on shape, follow the newer post.
| Topic | What Poshmark says | What to do |
|---|---|---|
| Covershot | The first photo in a listing; use a white or simple background | Make your cleanest full-item photo the first one |
| Shape | Portrait format, 3:4 ratio; cover photos no longer display square | Shoot with the phone held upright |
| Number of photos | Maximum of 16 | Use the slots for angles, tag, flaws and details |
| Video | 1 video per listing | Add one if movement or fit is hard to show in stills |
| Flaws | Include photos of any rips, stains or signs of wear | Give each flaw its own close-up |
| Existing square photos | Kept as they are; no action is needed | Check how your covers look, retake only if needed |
| Pixel size | Not stated on these pages | Use your phone's full-resolution photo |
What size and shape should Poshmark photos be?
Shoot in portrait at a 3:4 ratio. Poshmark's 2026 post says listing photos will appear in portrait format (3:4 ratio) across Poshmark, and that cover photos now display in portrait (3:4) instead of square (1:1). It notes that some devices show this as 4:3 and that the two represent the same format.
The post says a phone camera already defaults to portrait (3:4), so no manual cropping is needed when you take a new photo with your phone. On desktop, it says photos automatically display in a portrait frame and that crop and zoom tools are available if you need to adjust how a photo appears.
None of the three Poshmark pages gives a pixel size or a file size limit, so this article does not give one either.
If you still have square photos, you do not have to replace them. Poshmark says your existing square photos are still there, that no action is needed, and that shoppers can view the entire original image on the listing details page. It also says photos in search and feed may slightly adjust square photos, so look at your own closet and check that no hem, sleeve or strap is cut off in the cover view. Poshmark says the update is rolling out gradually in the app, so app and desktop may differ for a time.
What makes a good Poshmark cover shot?
A good Covershot shows the whole item, centered, on a plain background. Poshmark's photography guide describes the Covershot as the first photo in a listing and the first impression of the item, and it advises keeping it product focused with a white or simple background.
The 2026 post adds framing advice for the portrait shape:
- Center your item vertically and horizontally so it displays well in the feed.
- Fill the frame with the item, and leave a slight space around the edges.
- Show the full item, without cutting off key parts like hems, sleeves or straps.
- Use bright, even lighting, and keep backgrounds clean and uncluttered.
The guide says you can style the Covershot as a flat lay, on a mannequin, hanging or modeled, and advises staying consistent across new listings.
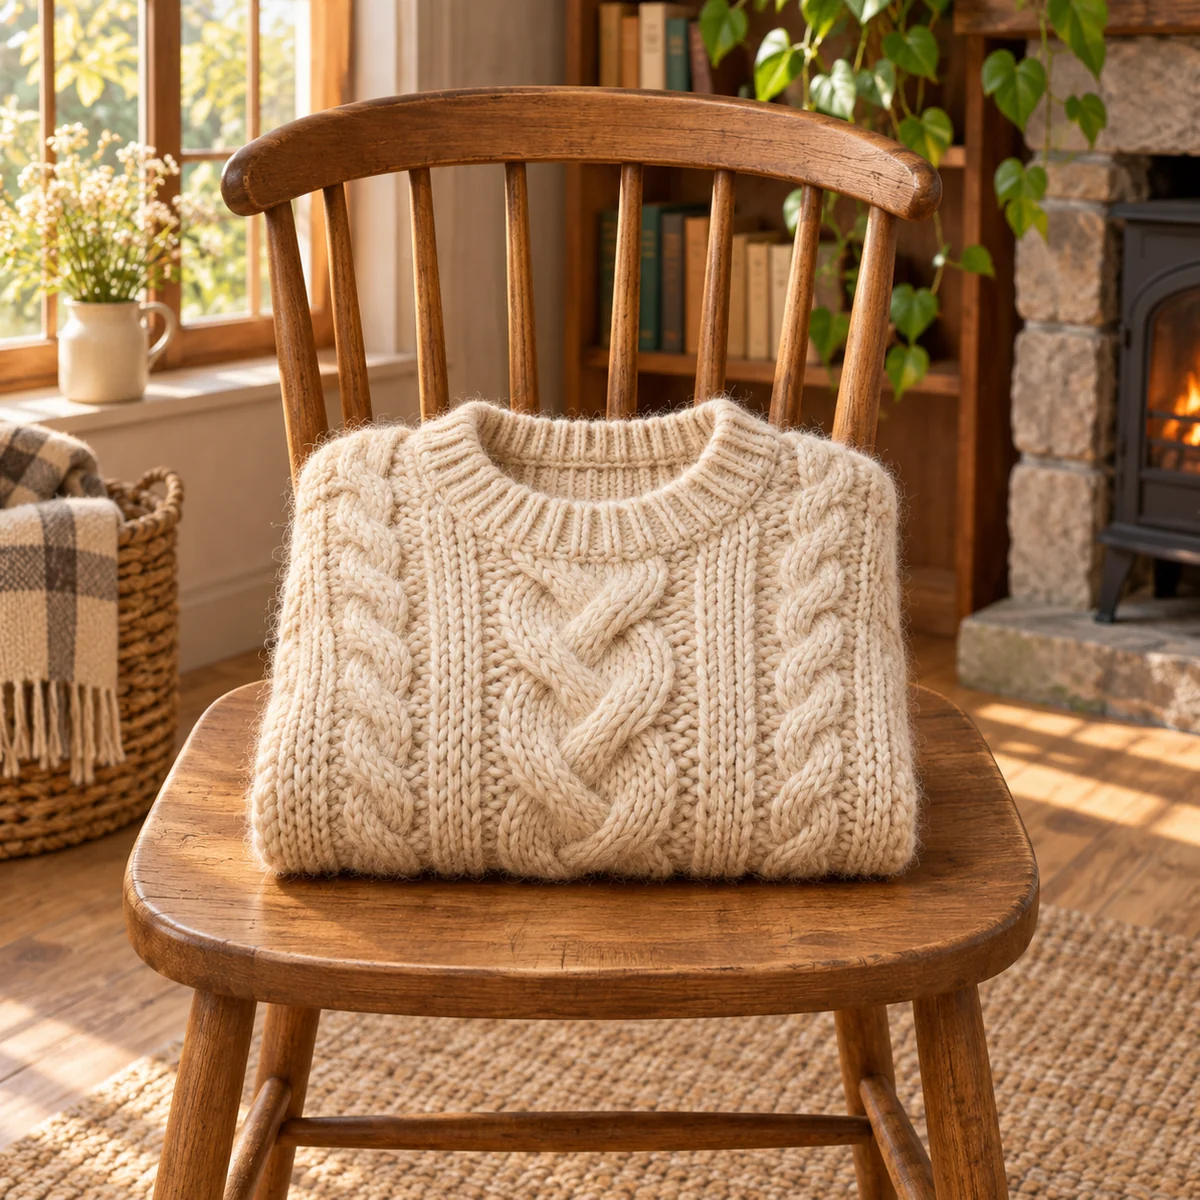
In the example below, the folded sweater first competes with a chair, a window, a basket and a fireplace. In the second photo, only the sweater is left.
Illustrative example made with KrafLayer.
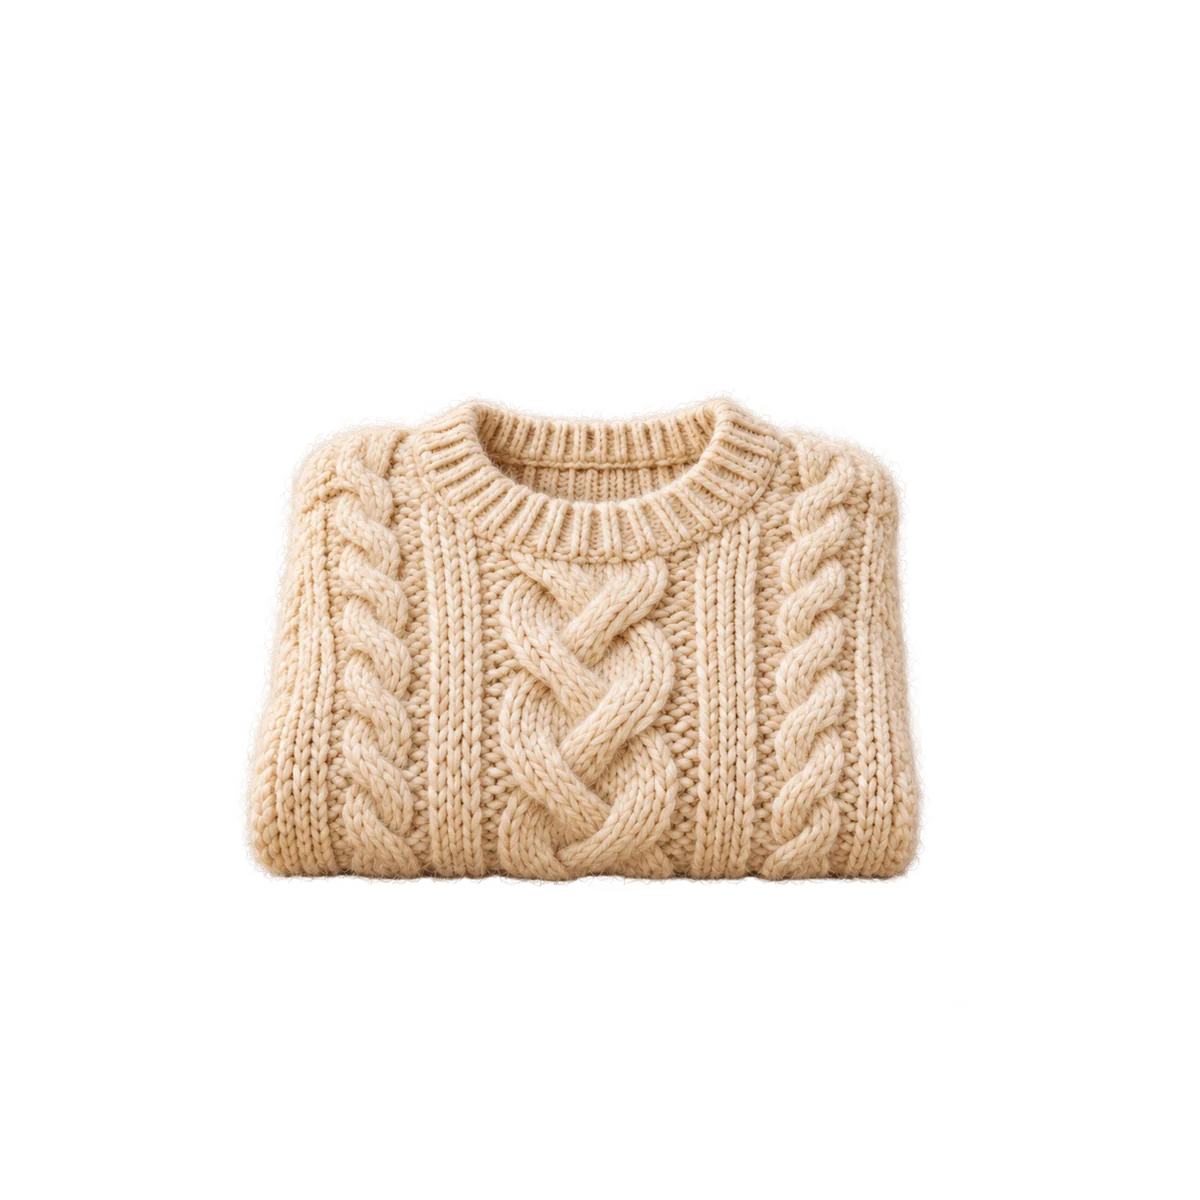
A folded sweater hides the length, the sleeves and the hem. For a Covershot, Poshmark's advice to show the full item points to laying it out flat or hanging it.
How many photos can you upload to a Poshmark listing?
You can upload up to 16 photos. Poshmark's listing help guide states that the maximum number of photos you can upload is 16, and that you can upload more than one photo at a time. The photography guide gives the same number and says you can add 1 video as well.
Poshmark's guide names what the detail photos should cover. A shot list for one clothing item, built from that guide, looks like this:
- Covershot: the full item, centered, on a white or simple background.
- Front, laid out flat.
- Back, laid out flat.
- The tag, so the buyer can reference the sizing.
- A close-up of the texture or of details such as buttons, cuffs or a zipper.
- The item next to something else, to show scale.
- One close-up for each flaw.
Poshmark's luxury item guide asks for more on high-value pieces: for a handbag, a full front shot of the entire bag, a close-up of the label and details of the hardware; for shoes, a clear photo of the soles.
How should you show flaws in Poshmark photos?
Photograph every flaw directly and do not edit it out. Poshmark's photography guide says you should include photos of any possible rips, stains or signs of wear. The luxury guide says any flaws or wear should be disclosed in the description or shown in photos to avoid disputes.
Give each flaw its own close-up in good light, add a wider photo that shows where on the garment it sits, and mention the same flaw in the description.
Color is part of condition. The photography guide recommends natural light and warns that most household bulbs cast a warm yellow light, which can make an image look off-color, especially denim. If your photos already have that tint, see how to fix yellow color cast in product photos.
How do you prepare Poshmark listing photos with KrafLayer?
Use KrafLayer to clean up the background of the Covershot, and leave the item itself alone. KrafLayer works from the product photo you upload. Each run uses credits, the cost is shown before the run, and the free plan includes a recurring credit refill.
- Read the checklist and examples on the Poshmark listing photos guide page. It is a reference page, not an upload tool.
- Photograph the item with your phone held upright, laid out flat or hanging, with the whole garment in the frame.
- Open the AI background remover and upload the Covershot there.
- Keep the item on white or a simple light color, with a slight space around the edges.
- Upload it to Poshmark as the first photo, check the cover in your closet for cut-off hems or sleeves, and adjust the framing with Poshmark's crop and zoom tools if needed.
- Add the detail and flaw photos as you shot them.
AI output must be compared with the real product before publishing. On knitwear like the sweater above, check that the cable pattern and rib lines are unchanged, that the fuzzy fibers along the edge have not been cut into a hard outline, and that the cream color has not shifted warmer or cooler. On any used garment, check that pilling, stains, pulled threads and worn cuffs are still visible, and that the tag text has not been redrawn.
For edge problems after a cutout, see remove product photo backgrounds: edge and shadow checks. If the garment is creased, see smooth clothing wrinkles in product photos with AI.
Frequently Asked Questions
Are Poshmark photos still square?
No. Poshmark's March 2026 post says cover photos now display in portrait (3:4) instead of square (1:1). Its older photography guide still describes square photos, so treat that part of the guide as out of date.
Do I need to retake my old square Poshmark photos?
No. Poshmark says existing square photos are still there and that no action is needed. You can update a cover photo if you prefer, but Poshmark says it is not required.
How many photos does Poshmark allow per listing?
The maximum number of photos you can upload is 16, according to Poshmark's listing help guide. The photography guide adds that a listing can include 1 video.
What background should a Poshmark cover shot have?
Poshmark recommends a white or simple background for the Covershot. Its 2026 post gives the same direction in different words: keep backgrounds clean and uncluttered.
Sources
- A New Look for Listing Photos, Poshmark Blog, checked November 20, 2026
- The Poshmark Listing Photography Guide, Poshmark Blog, checked November 20, 2026
- How Do I List an Item?, Guide to Poshmark, checked November 20, 2026
- How Do I List a Luxury Item?, Guide to Poshmark, checked November 20, 2026
Keep exploring
Continue the story
More practical guidance on product accuracy, composition, and conversion-ready visuals.
Put it into practice
Take the next step in KrafLayer
Choose a generation or editing workflow that matches what you just learned.